 Running a website that is simultaneously fast, stable, secure and affordable is actually quite a difficult feat, but I’ll show you how to use a cheap KVM VPS to host a reliable and secure web site that will outperform 99% of the web sites on the Internet.
Why use a KVM VPS?
While shared hosting is typically fairly inexpensive, it is rarely fast and almost certainly not secure.
While I do still run several websites on shared web hosting servers from DreamHost and HostGator, because of their extremely cheap hosting accounts, broad feature sets and easy to use control panels, I simply can’t get the speed or security I need from shared hosting.
Dedicated servers are certainly faster and more secure, but generally expensive by comparison. Though I could always host a webserver locally, now that I’m living in an RV full-time, it would be both impractical and unwieldy, and likely rather prone to failure. Alternatively, I chose to run this blog on a KVM (kernel virtual machine) VPS (virtual private server) running on SSD (solid state disks) to ensure maximum performance. With the increasing prevalence of VPS solutions and the dropping costs of SSD-based storage, it has become significantly less expensive to achieve the hosting trifecta: speed, stability and security. This is also a perfect setup for SEO hosting if you use WordPress Multisite and run multiple VPSes from a variety of geographically distant KVM VPS providers. At the time of this article, you can rent an SSD-based KVM VPS for as little as $5/mo at DigitalOcean, and $6/mo at RamNode, and for just a little bit more you can get cheap VPS packages that provide automatic DDoS protection as well!
The architecture described in this how-to was inspired largely by Daniel Miessler’s “Stack,” and the additional measures detailed below are based on my own desire to ensure simplified maintenance and high security with relatively low ongoing management overhead.
In this tutorial, I’ll walk you through the exact steps I’ve taken to setup my Linux KVM VPS server, install and configure a LEMP web stack (Linux + Nginx + MySQL + PHP) and enable simple tools for management and security.
Want to follow along? Grab a Linux SSD-based Linux KVM VPS from RamNode or DigitalOcean (or your favorite hosting provider), grab a cheap domain from NameCheap, and you’re ready to get started!
Note: for the purpose of this tutorial, I am using a RamNode KVM RAID10 SSD VPS with 1024MB RAM (the “1024MB SKVM” plan), to which I have full root access.
Step 1a: Install and configure a Linux KVM VPS
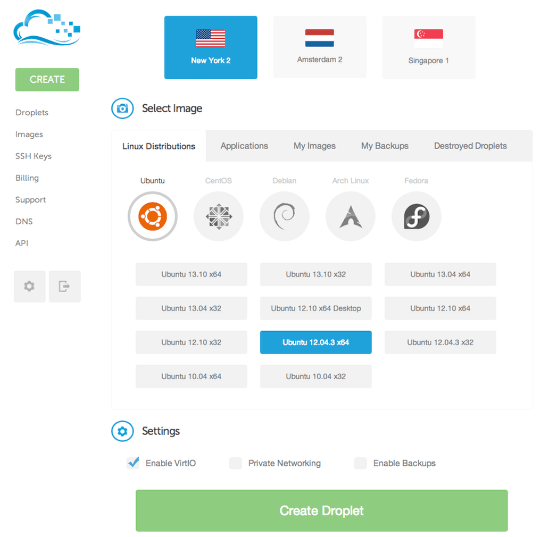
This screenshot is of DigitalOcean‘s droplet installation control panel. TravelHiTech.com is running on a RamNode 4- core KVM SSD VPS with 1 GB of RAM and 30 GB of SSD storage.
Note that you can also use an OpenVZ VPS to follow along with this tutorial, though a few of the steps indicated below will not apply to OpenVZ.
Step 1b: Configure KVM VPS hardware options
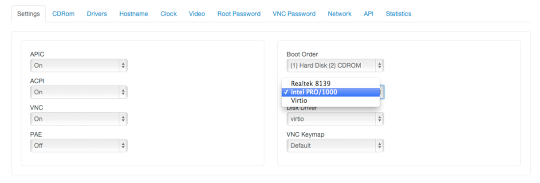
(Note: this step is not applicable to OpenVZ VPSes.)
According to RamNode, If you’re using Ubuntu 12.04 LTS with KVM (which I used to build this server), you’ll probably want to use a virtual Intel NIC, as it may provide better performance than VirtIO network drivers. However, you should use VirtIO disk drivers if available to ensure maximum I/O performance. This screenshot is from RamNode‘s KVM VPS Control Panel.
Step 1c: Immediately change (or unset) the root password
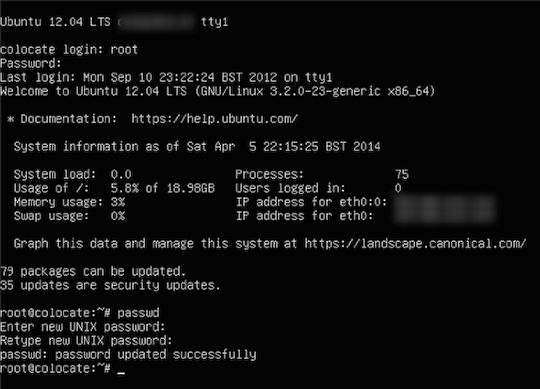
Many VPS providers will assign a random root password to your VPS at first boot. It is still strongly suggested that you immediately change the root password to a secure password of your own choosing (or one that your password manager generates):
# passwd root
Alternatively, you can unset the root password. See the instructions following the creation of your new user below.
Step 1d: Add a non-root user
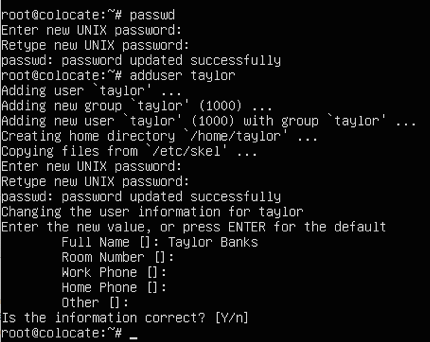
Security best practices dictate that you shouldn’t login or use the root account except when absolutely necessary. As such, we’ll create a non-root user and add that user to the admin group so that Ubuntu’s default sudoers rules will allow us to use sudo to gain elevated privileges when we need them:
# adduser
# groupadd admin
# usermod -a -G admin
While we’re at it, it’s not a bad idea to change permissions on /bin/su to prevent non-admin users from even attempting to gain root:
# dpkg-statoverride --update --add root admin 4750 /bin/su
Now would be a great time to logout of the VNC console and login via SSH using your newly created user.
Also, if you want to, you can now unset the root password so that the only way to obtain root privileges will be via su and sudo:
$ sudo usermod -p '!' root
If you do this, check /var/log/auth.log over the next couple of days for entries like:
CRON[14357]: pam_unix(cron:account): account root has expired (account expired)
If you see those then run:
$ sudo passwd --unlock root
followed by:
$ sudo usermod --lock root
Step 1e: Setup public key authentication and lockdown SSH
To prevent unauthorized access to your VPS, it’s important that you take a few steps to lockdown your SSH daemon. First and foremost, you should generate a key pair to use for authentication to your new server, then copy the public key to the server’s authorized_keys file. On your client machine, perform the following:
$ ssh-keygen $ ssh-copy-id -i@
If you don’t have ssh-copy-id (as is the case on Mac OS X by default), you can either brew it with Homebrew:
$ brew install ssh-copy-id
or, you can accomplish the same thing without ssh-copy-id with the following command line:
$ cat ~/.ssh/| ssh @ \ "mkdir ~/.ssh; cat >> ~/.ssh/authorized_keys"
Now, login to the server to confirm that you can login without being prompted for a password:
$ ssh@
If you are unable to login without specifying a password, you should stop here and troubleshoot public key authentication before moving on.
Next, edit /etc/ssh/sshd_config and add or modify the following directives:
PermitRootLogin no
PasswordAuthentication no
*** WARNING – do NOT set the PasswordAuthentication directive to “no” until you have verified that you are able to login *without* a password using the key you created above! ***
Optionally, you can also change the port your SSH server runs on by specifying it here as well. I’ve elected not to do this to simplify remote management using Mosh (discussed later on) and because I feel comfortable with the combination of key-only authentication and brute-force prevention tools discussed below (DenyHosts and Fail2Ban).
If you want to change your SSH port anyway, modify the following:
Port
When you’re satisfied with your changes, you can restart SSH with:
$ sudo service ssh restart
Optional: If using a RamNode KVM VPS, re-format swap
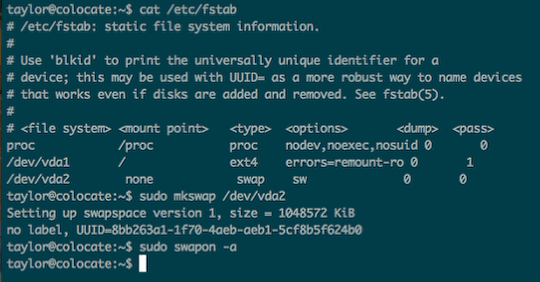
(Note: this step is not applicable to OpenVZ VPSes.)
For some reason, the swap partition on a RamNode KVM SSD VPS isn’t always properly formatted on a fresh image, so we’ll re-format it and re-enable it to ensure that we have adequate swap available under low-memory conditions. To determine which partition is your swap partition, take a peek at fstab, then use “mkswap” to format and “swapon” to enable the swap partition.
$ cat /etc/fstab
$ sudo mkswap /dev/
$ sudo swapon -a
Step 1f: Tweak fstab for performance and security
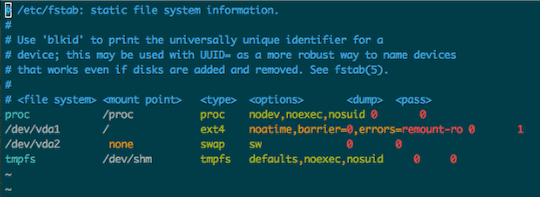
(Note: this step is not applicable to OpenVZ VPSes.)
Since our KVM VPS is running on SSD, we can make a couple of tweaks to fstab to improve filesystem performance and we’ll add a couple of options to help better secure shared memory.
For the root filesystem, we’ll ad “noatime” and “barrier=0” to the filesystem’s mount options. When a filesystem is mounted with the noatime option, read accesses to the filesystem will not result in an update to atime information; this eliminates the need to make writes to the filesystem for files which are simply being read.
Additionally, ext filesystems send “write barriers” to disk after sync or during transaction commits. Write barriers enforce proper ordering of writes, making volatile disk write caches safe to use (with a performance penalty). If your disks are battery-backed (or in our case, virtual disks residing on RAID 10 SSD arrays) disabling barriers may safely improve performance.
old fstab: #/dev/vda1 / ext4 errors=remount-ro 0 1
would be updated to look like:
new fstab: #/dev/vda1 / ext4 noatime,barriers=0,errors=remount-ro 0 1 tmpfs /dev/shm tmpfs defaults,noexec,nosuid 0 0
Note: If you’re running an Ubuntu version >12.04, you’ll want to replace “/dev/shm” with “/run/shm”
Step 1g: Tweak sysctl.conf for performance and security
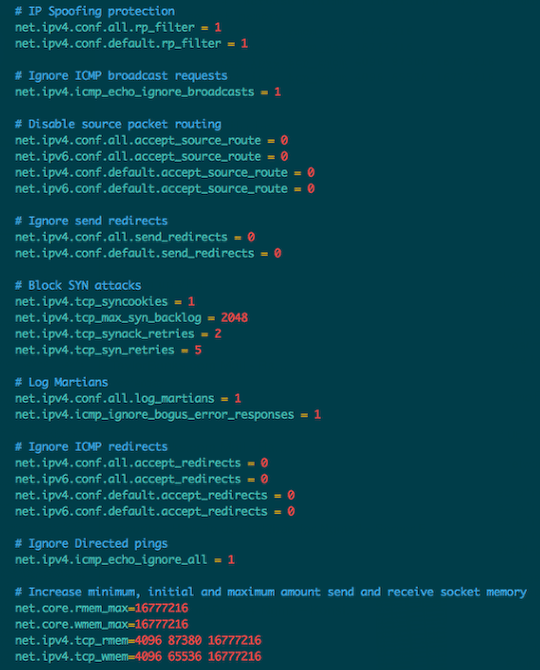
Sysctl is a tool for examining and changing kernel parameters at runtime. By modifying sysctl.conf, we can fine tune kernel and network behavior to improve both the performance and security of our virtual private server. Edit /etc/sysctl.conf file:
$ sudo vi /etc/sysctl.conf
Add or modify the following values:
# IP Spoofing protection
net.ipv4.conf.all.rp_filter = 1
net.ipv4.conf.default.rp_filter = 1
# Ignore ICMP broadcast requests
net.ipv4.icmp_echo_ignore_broadcasts = 1
# Disable source packet routing
net.ipv4.conf.all.accept_source_route = 0
net.ipv6.conf.all.accept_source_route = 0
net.ipv4.conf.default.accept_source_route = 0
net.ipv6.conf.default.accept_source_route = 0
# Ignore send redirects
net.ipv4.conf.all.send_redirects = 0
net.ipv4.conf.default.send_redirects = 0
# Block SYN attacks
net.ipv4.tcp_syncookies = 1
net.ipv4.tcp_max_syn_backlog = 2048
net.ipv4.tcp_synack_retries = 2
net.ipv4.tcp_syn_retries = 5
# Log Martians
net.ipv4.conf.all.log_martians = 1
net.ipv4.icmp_ignore_bogus_error_responses = 1
# Ignore ICMP redirects
net.ipv4.conf.all.accept_redirects = 0
net.ipv6.conf.all.accept_redirects = 0
net.ipv4.conf.default.accept_redirects = 0
net.ipv6.conf.default.accept_redirects = 0
# Ignore Directed pings
net.ipv4.icmp_echo_ignore_all = 1
# Increase send and receive socket memory
net.core.rmem_max=16777216
net.core.wmem_max=16777216
net.ipv4.tcp_rmem=4096 87380 16777216
net.ipv4.tcp_wmem=4096 65536 16777216
Step 2a: Update package cache, then install packages
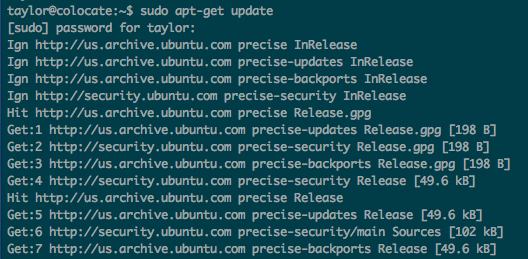
First, update your apt package index:
$ sudo apt-get update
Step 2b: Install and configure Mosh
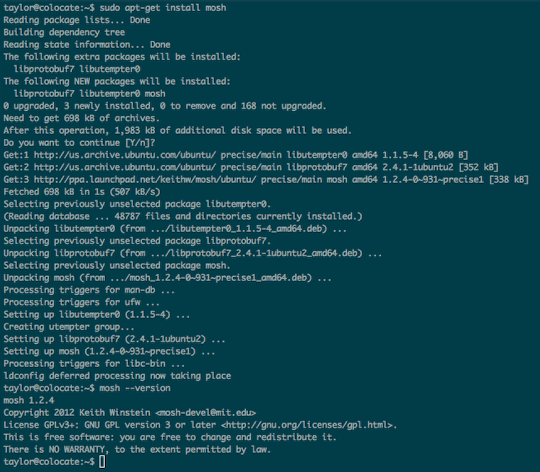
For remote management, I prefer Mosh over SSH, as it is more robust and responsive, especially over Wi-Fi, cellular, and long-distance links (important to those of us living in RVs).
With Mosh, you can put your laptop to sleep and wake it up later, keeping your connection intact. If your Internet connection drops, Mosh will warn you — but the connection resumes when network service comes back.
Mosh doesn’t actually listen on network ports or authenticate users. Instead, the mosh client logs in to the server via SSH, and users present the same credentials (e.g., password, public key) as before, then Mosh runs the mosh-server remotely and connects to it over UDP.
Mosh is super easy to install and configure on Ubuntu:
$ sudo apt-get install python-software-properties
$ sudo add-apt-repository ppa:keithw/mosh
$ sudo apt-get update
$ sudo apt-get install mosh
To install the mosh client on my MacBook Air, I use Homebrew:
$ brew install mobile-shell
If you’re not already using Homebrew on your Mac (you should be), you’ll find a Mac OS X installer package available for download at http://mosh.mit.edu
For mosh on my iPad, I use iSSH, and on my Android phone I use JuiceSSH, both of which offer native support for Mosh. 🙂
Step 2c: Enable Byobu
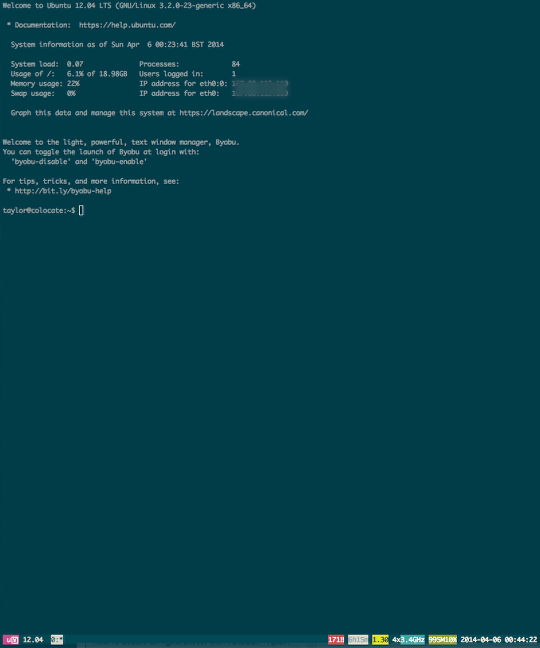
I’ve long been a fan of screen for remote management, though in recent years, I started to rely more on tmux when available. For management of remote Ubuntu servers, I’ve now started using Byobu, which includes enhanced profiles, convenient keybindings, configuration utilities, and toggle-able system status notifications for both screen and tmux. For those new to terminal multiplexers in general, consider the following benefits:
- Terminal multiplexers let you switch easily between several programs in one terminal, detach them (they keep running in the background) and reattach them to a different terminal
- Terminal multiplexers allows the user to start applications from one computer and then reconnect from a different computer and continue using the same application without having to restart it
- Multiple terminal sessions can be created, each of which usually runs a single application; windows are numbered, and the user can use the keyboard to switch between them
- Terminal multiplexers allow multiple computers to connect to the same session at once, enabling collaboration between multiple users
On modern Ubuntu builds, Byobu is already installed, so we’ll simply need to enable it to see it in action. However, it never hurts to do an “apt-get install” in case your VPS is missing any essential packages:
$ sudo apt-get install byobu
$ byobu-enable
Step 3a: Install and configure UFW, the Ubuntu firewall
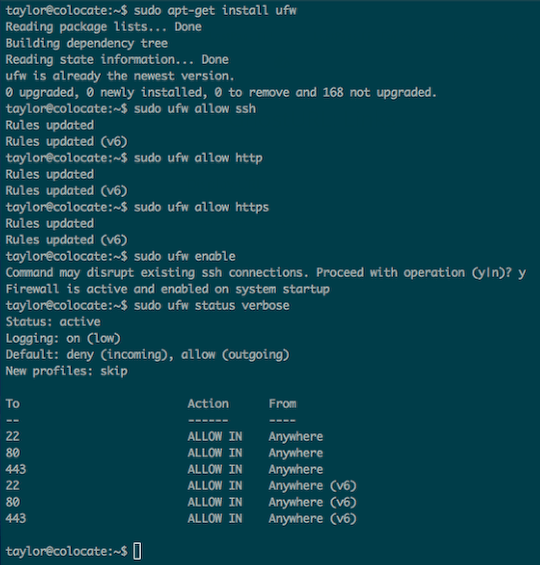
UFW (the Uncomplicated Firewall) may already be installed into your VPS Ubuntu build, but there’s no harm in attempting to install it anyway, as Ubuntu will simply tell you that the latest version is already installed. Once installed, we’ll want to allow inbound SSH, HTTP and HTTPS traffic, then enable the firewall and verify our firewall configuration:
$ sudo apt-get install ufw
$ sudo ufw allow ssh
$ sudo ufw allow http
$ sudo ufw allow https
$ sudo ufw allow mosh
$ sudo ufw enable
$ sudo ufw status verbose
Step 3b: Protect your VPS from brute force attacks against SSH with Fail2Ban

By disabling root logins and password-based authentication, you’ve already significantly reduced the attack surface of your server and have all but eliminated the possibility that an attacker will be able to gain remote access by way of SSH.
Nevertheless, scripts and bots will find port 22 open on your server and will make seemingly ceaseless attempts to gain access, trying literally hundreds of thousands of well-known usernames (and passwords, if you were still allowing password-based authentication).
At the very least, you can prevent these brute force attempts from causing unnecessary performance problems due to resource exhaustion by stopping them with your iptables firewall and/or tcpwrappers, support for which is built into the OpenSSH daemon running on your host.
To stop these malicious script kiddies at your firewall, you’ll install Fail2Ban and make a few changes in order for it to use UFW to insert new firewall rules.
$ sudo apt-get install fail2ban
Copy the default jail.conf file to a new configuration file called jail.local to keep your changes separate from the defaults:
$ sudo cp /etc/fail2ban/jail.conf /etc/fail2ban/jail.local
Add your local IP to the “ignoreip” directive in jail.local to keep your own host from getting blocked (you can add multiple IPs separated by spaces):
ignoreip = 127.0.0.1/8
If you want Fail2Ban to email you each time it bans a new IP, modify the email address in “destemail” to be your own:
destemail =
Change the default action behavior from “ban only” to “ban & send an e-mail with whois report and relevant log lines” by modifying the line that looks like this:
action = %(action_)s
to look like this:
action = %(action_mwl)s
I would also recommend increasing the default “bantime” from the default of 10 minutes (600s to one hour (3600s):
bantime = 3600
The default configuration already has a pre-defined jail for SSH, but you’ll want to change the “banaction” to use UFW to ensure consistent firewall configuration and management:
    [ssh]

    enabled  = true
    banaction = ufw-ssh
    port     = ssh
    filter   = sshd
    logpath  = /var/log/auth.log
    maxretry = 6
You’ll also need to create a new file called ufw-ssh.conf in /etc/fail2ban/action.d with the following contents:
$ sudo vi /etc/fail2ban/action.d/ufw-ssh.conf
[Definition] actionstart = actionstop = actioncheck = actionban = ufw insert 1 deny fromto any app OpenSSH actionunban = ufw delete deny from to any app OpenSSH
Finally, restart fail2ban, and optionally tail the fail2ban logfile to see hosts as they are banned (and unbanned):
    $ sudo service fail2ban restart
    $ sudo fail2ban-client status
    $ sudo tail -f /var/log/fail2ban.log
Step 3c: Install chkrootkit to perform periodic security checks
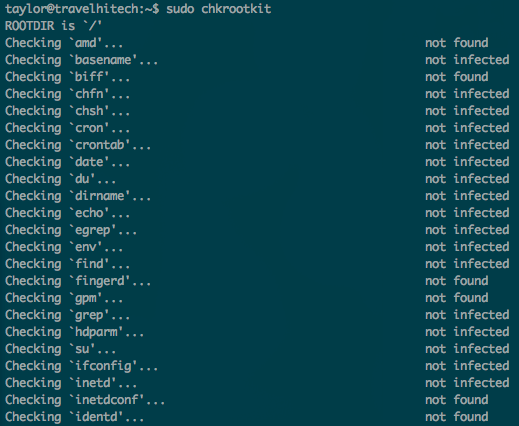
Chkrootkit is a tool to locally check for signs of a rootkit, the presence of which would indicate a significant compromise of your server. To install:
$ sudo apt-get install chkrootkit
To perform checks for signs of local rootkits:
$ sudo chkrootkit
Optional: Install and enable DenyHosts to permanently block attackers using tcpwrappers
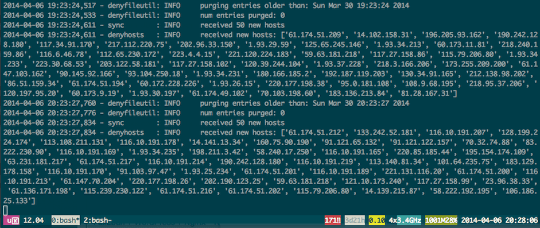
Fail2Ban is quite a powerful tool, capable of protecting not only SSH, but myriad other services as well.
Later, you’ll create a custom jail for WordPress running on Nginx to allow fail2ban to protect you from brute force and dictionary attacks against your WordPress admin login.
With SSH, however, you may find that some attackers are quite relentless, and that despite blocking for hours at a time with UFW and iptables, they will nonetheless persist in attacking your VPS host as soon as their IP is unbanned (according to the configurable timeframe you set within Fail2Ban).
If you want to take a “belt and suspenders” approach to securing SSH, you can add DenyHosts to your VPS to also add attackers to your /etc/hosts.deny file so that they are unable to establish a connection to your SSH daemon, even after their ban has expired within Fail2Ban.
I wrote a short blog post about DenyHosts on the kaos.theory blog back in 2005, and although DenyHosts has evolved a bit since then, it is still a fairly simple tool with a fairly simple purpose.
One particularly interesting benefit to using DenyHosts is that it also now offers a “synchronization mode,” which allows the DenyHosts daemon to proactively thwart attackers before they strike your ssh server!
DenyHosts is quite easy to install and configure:
$ sudo apt-get install denyhosts
The defaults should work out of the box, but if you want to tweak a few values, I would suggest modifying or adding the following values to /etc/denyhosts.conf:
$ sudo vi /etc/denyhosts.conf
# purge entries older than 1 week PURGE_DENY = 1w # a denied host will be purged at most 2 times. PURGE_THRESHOLD = 2 ADMIN_EMAIL =SYNC_SERVER = http://xmlrpc.denyhosts.net:9911 SYNC_UPLOAD = yes SYNC_DOWNLOAD = yes SYNC_DOWNLOAD_RESILIENCY = 5h $ sudo service denyhosts restart
Step 4a: Install and configure your LEMP stack
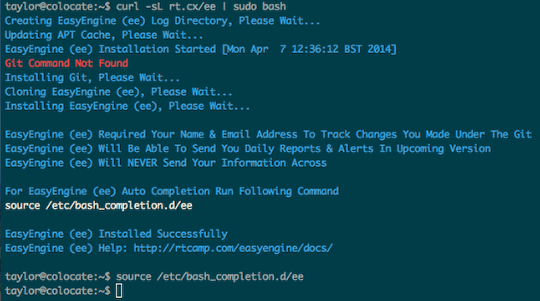
Now that we’ve got a pretty stable and secure Linux KVM VPS setup, let’s proceed with the rest of our LEMP stack. If you’re not familiar with the stack, LEMP is a phonetic acronym for Linux + Nginx (pronounced “engine-x”) + MySQL + PHP.
While the individual components aren’t terribly difficult to install and configure individually, the good folks over at rtCamp have put together a pretty slick shell script called EasyEngine that not only installs and configures the LEMP stack, but also makes creating standalone WordPress sites and WordPress multisites rather trivial.
EasyEngine is open source, and rather straightforward at that, so it’s pretty simple to confirm that the scripts aren’t doing anything other than what they claim to do: install and configure Nginx, MySQL, PHP-FPM and WordPress, with appropriate configuration tweaks to ensure maximum compatibility and performance between and amongst each of these components.
To install EasyEngine and a full LEMP stack, you only need to run two commands. First, run:
$ sudo apt-get install curl
$ curl -sL rt.cx/ee | sudo bash
EasyEngine claims the ability to use git to save changes you make to core configuration files. On installation, ee should prompt you to specify your git user name and email address. In my case, however, these values were already set globally using root as my username and root@myhostname as my email address, so I changed them manually after installing ee:
    $ git config --global user.name ""
    $ git config --global user.email
To complete the installation of your LEMP stack, next run:
$ sudo ee system install
If all goes well, you’ll be prompted for an IP address to whitelist (this should be your client’s public IP) and a username and password to protect the EasyEngine “system area” with basic auth.
It is VERY important that you set the username and password here, otherwise your site will use “easyengine” as a default username and password to protect your new installation!
Step 4b: Tweak OPcache and Memcache defaults
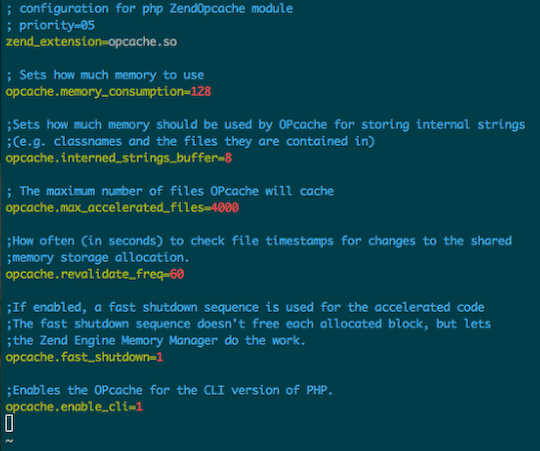
OPcache improves PHP performance by storing precompiled script bytecode in shared memory, thereby removing the need for PHP to load and parse scripts on each request.You can use the following settings to improve OPcache performance on a KVM VPS with at least 1 GB of RAM:
$ sudo vi /etc/php5/fpm/conf.d/05-opcache.ini
Add:
    ; Sets how much memory to use
    opcache.memory_consumption=128

    ;Sets how much memory should be used by OPcache for storing internal strings
    ;(e.g. classnames and the files they are contained in)
    opcache.interned_strings_buffer=8

    ; The maximum number of files OPcache will cache
    opcache.max_accelerated_files=4000

    ;How often (in seconds) to check file timestamps for changes to the shared
    ;memory storage allocation.
    opcache.revalidate_freq=60

    ;If enabled, a fast shutdown sequence is used for the accelerated code
    ;The fast shutdown sequence doesn't free each allocated block, but lets
    ;the Zend Engine Memory Manager do the work.
    opcache.fast_shutdown=1

    ;Enables the OPcache for the CLI version of PHP.
    opcache.enable_cli=1
Memcached is a high-performance, distributed memory object caching system intended for use in speeding up dynamic web applications by alleviating database load.
If your KM VPS has 1 GB of RAM or more, I also suggest the following change to /etc/memcached.conf:
$ sudo vi /etc/memcached.conf
Find the line that says “-m 64” and increase it to “-m 128“.
Step 5a: Install and configure WordPress
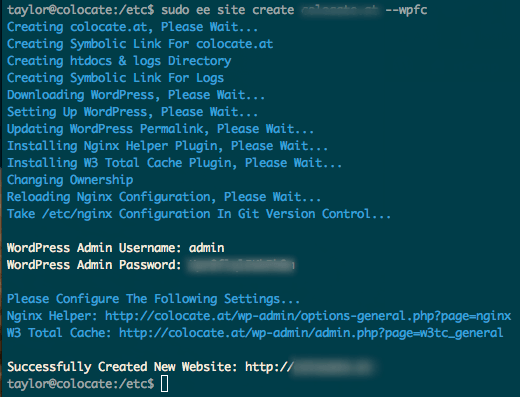
EasyEngine makes the installation and configuration of WordPress on top of Nginx, MySQL and PHP super easy.
Having installed ee and used ee to do your LEMP system install, it’s time to setup and install our first WordPress site. The basic command line shown on the EasyEngine homepage shows how to install and configure a standalone WordPress site without caching, but for our purposes (extremem speed and high reliability), we’re going to use Niginx’s Fastcgi cache module, enabled with the –wpfc parameter:
$ sudo ee site create--wpfc
At the conclusion of the installation, ee will present you with a WordPress admin login and password.
Almost done!
You now have a full LEMP stack with WordPress installed and running on your server for the hosted domain you specified! Of course, you’ll still have to configure your DNS to point your domain to your VPS hosted IP before the new domain will work, and there are a few tweaks I’m going to have you make to help kick performance up a notch and ensure effective protection of your WordPress admin login URL.
Step 5b: Configure Nginx and WordPress to integrate with Fail2Ban and UFW
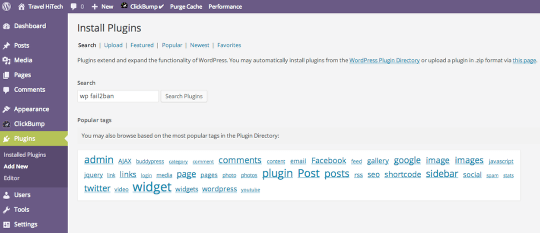
By default, Fail2Ban has filters for Apache and actions for iptables, but none for Nginx or WordPress and no actions for UFW.
Earlier, you created a custom action for Fail2Ban to ban IPs attempting to attach your SSH daemon, and you’ll extend that support here to ban IPs attempting to brute force your WordPress admin login.
By default, WordPress returns authentication failures with the status code 200 (which is the same status code as an authentication success), so distinguishing the two in Nginx’s access log is problematic. To get around this, you’ll install a WordPress plugin called “WP fail2ban” by searching for it from your WordPress admin dashboard.
Once installed, you’ll need to copy the new filter to fail2ban’s configuration directory:
$ sudo cp /var/www//htdocs/wp-content/plugins/wp-fail2ban/wordpress.conf /etc/fail2ban/filter.d/
Next, you’ll add a new action for blocking access to Nginx with UFW:
$ sudo vi /etc/fail2ban/action.d/ufw-nginx.conf [Definition] actionstart = actionstop = actioncheck = actionban = ufw insert 1 deny fromto any app "Nginx Full" actionunban = ufw delete deny fromto any app "Nginx Full"
Finally, add the following stanza to your /etc/fail2ban/jail.local file and restart fail2ban:
    $ sudo vi /etc/fail2ban/jail.local

        [wordpress]

        enabled  = true
        banaction = ufw-nginx
        port     = http,https
        filter   = wordpress
        logpath  = /var/log/nginx/access.log
        maxretry = 3
        bantime  = 3600

    $ sudo service fail2ban restart
    $ sudo fail2ban-client status
Step 5c: Install a WordPress theme tuned for performance

Unfortunately, not all WordPress themes are built with performance in mind.
In fact, most WordPress theme designers focus on web design without also fully understanding concise CSS, javascript or programming techniques for optimizing content delivery.
Although I’ve used literally hundreds of WordPress themes across the past decade, I can say without hesitation that my new favorite and de-facto standard is the ClickBump Engine, as it provides unparalleled performance, incredible functionality and tremendous design flexibility through the use of a dynamic framework with responsive, CSS-driven skins.
If you’re anything like me, once you’ve seen ClickBump in action, you’ll never want to use any other themes or frameworks ever again. This blog runs on ClickBump, as do at least a half dozen other blogs and sites that I host or manage.
If you elect not to use ClickBump for your WordPress site, make sure to test your WordPress site with the theme you choose using Google’s PageSpeed Insights tool to identify potential performance problems before they impact your traffic, end-user experience, and ultimately, search engine rankings.
Step 6a: Add CloudFlare to speed up and protect your site from a range of online threats
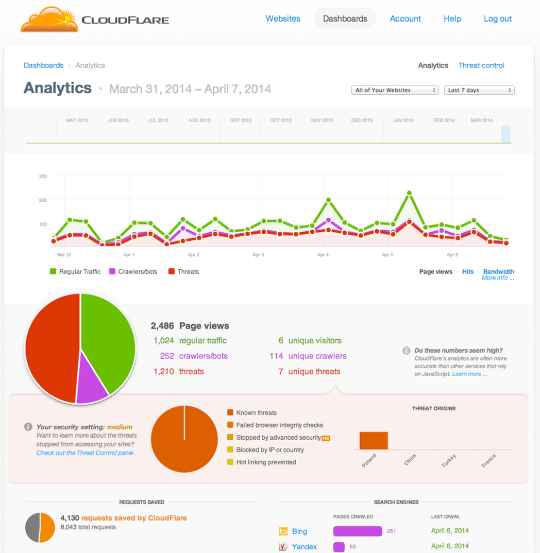
As a final step, you can enable CloudFlare in front of your WordPress install to provide both a global CDN and protection from well-known threats and denial of service attacks.
CloudFlare offers both free and paid services, either of which you can sign up for at http://cloudflare.com.
Step 6b: Test your site’s performance

There are several sites that will test your website’s performance and provide you with a report as well as additional recommendations for improving your website’s responsiveness. I generally use Google PageSpeed Insights and/or GTmetrix, which provides both a Page Speed grade and a YSlow grade.
You’ll find these and a few other useful performance testing tools at http://topalternatives.com/testing-your-websites-speed-and-performance.
Fin
That’s it!
You now have a fast, secure WordPress blog running on an SSD-backed Linux KVM VPS, likely performing as well as the top 1% of websites on the Internet!


2 responses to “The Quick Guide to Building a Lightning Fast WordPress Blog for $5 with a KVM VPS”
Taylor – thanks for the great article. I’m not much of a developer/hacker but do know my way around WordPress pretty well. I am currently working on providing a personal WordPress platform and hosting environment for individuals and small companies – a child theme, and a small group of plugins, properly setup and ready to go in one package. I’ve been in contact with the usual hosting companies which provide reseller services. Hosting that is “fast, stable, secure and affordable” and that is easy to setup and manage for multiple sites would be great. Might this setup be a good solution for someone of my skill level? Thanks.
Hi good tuto, for using cloudflare it necesarry use real-ip ?